Optimizing Screenshots on macOS Mojave
• ~600 words • 3 minute read
Taking a screenshot in macOS has always been straightforward. Shift-Command (⌘) 5 will bring up Grab.app and let you crop the section of the screen you want to capture.
In macOS Mojave this tool was changed to mirror the way screenshots work on iOS. I like the change and found myself switching back to the system default after using tools like Napkin and Skitch for the better part of the last decade. The built-in system tool now lets me capture screen shots and make quick little markups just easily as those tools did and is a welcome addition to my workflow.
Frequently I find myself taking screenshots to include in emails to clients for short tutorials or to clarify requests before acting on them. The only problem with this new screen capture tool is that the default file format is PNG. If I was concerned with isolating specific windows on my desktop and capturing them in their entirety that would be great, but for my purposes it was always unnecessary. Typically I'd take the screenshot, make the markups I need and then drop the image into a tool like Squoosh to optimize it further, and to avoid sending megabytes worth of attachments to my clients when a couple hundred kilobytes would do.
Changing the Default File Format
Although the new screen capture interface has a lot of options for how to capture your image, there is no GUI-visible option to change the default file format to a JPEG. It seems like a strange oversight to me. You can, however, change this setting on the command line:
defaults write com.apple.screencapture type JPG
Nice!
Optimizing with Automator
The JPEG files that Mojave produces are still bloated. I don't need the highest quality 90% of the time when I'm embedding them in emails and blog posts. I can still drag the image to Squoosh or optimize the images on the command-line using a tool like ImageMagick but I decided to use Automator to make a folder action workflow instead. This way the JPEG images I create can be automatically optimized when I save them to a specific folder.
To do this I launched Automator, chose New from the File menu and created a new Folder Action. A folder action can be attached so a specific folder and will run whenever a new item is added to it.
From the library of options Automator provides I chose Run Shell Script and wrote a single line:
/usr/local/bin/mogrify -strip -quality 75 $1
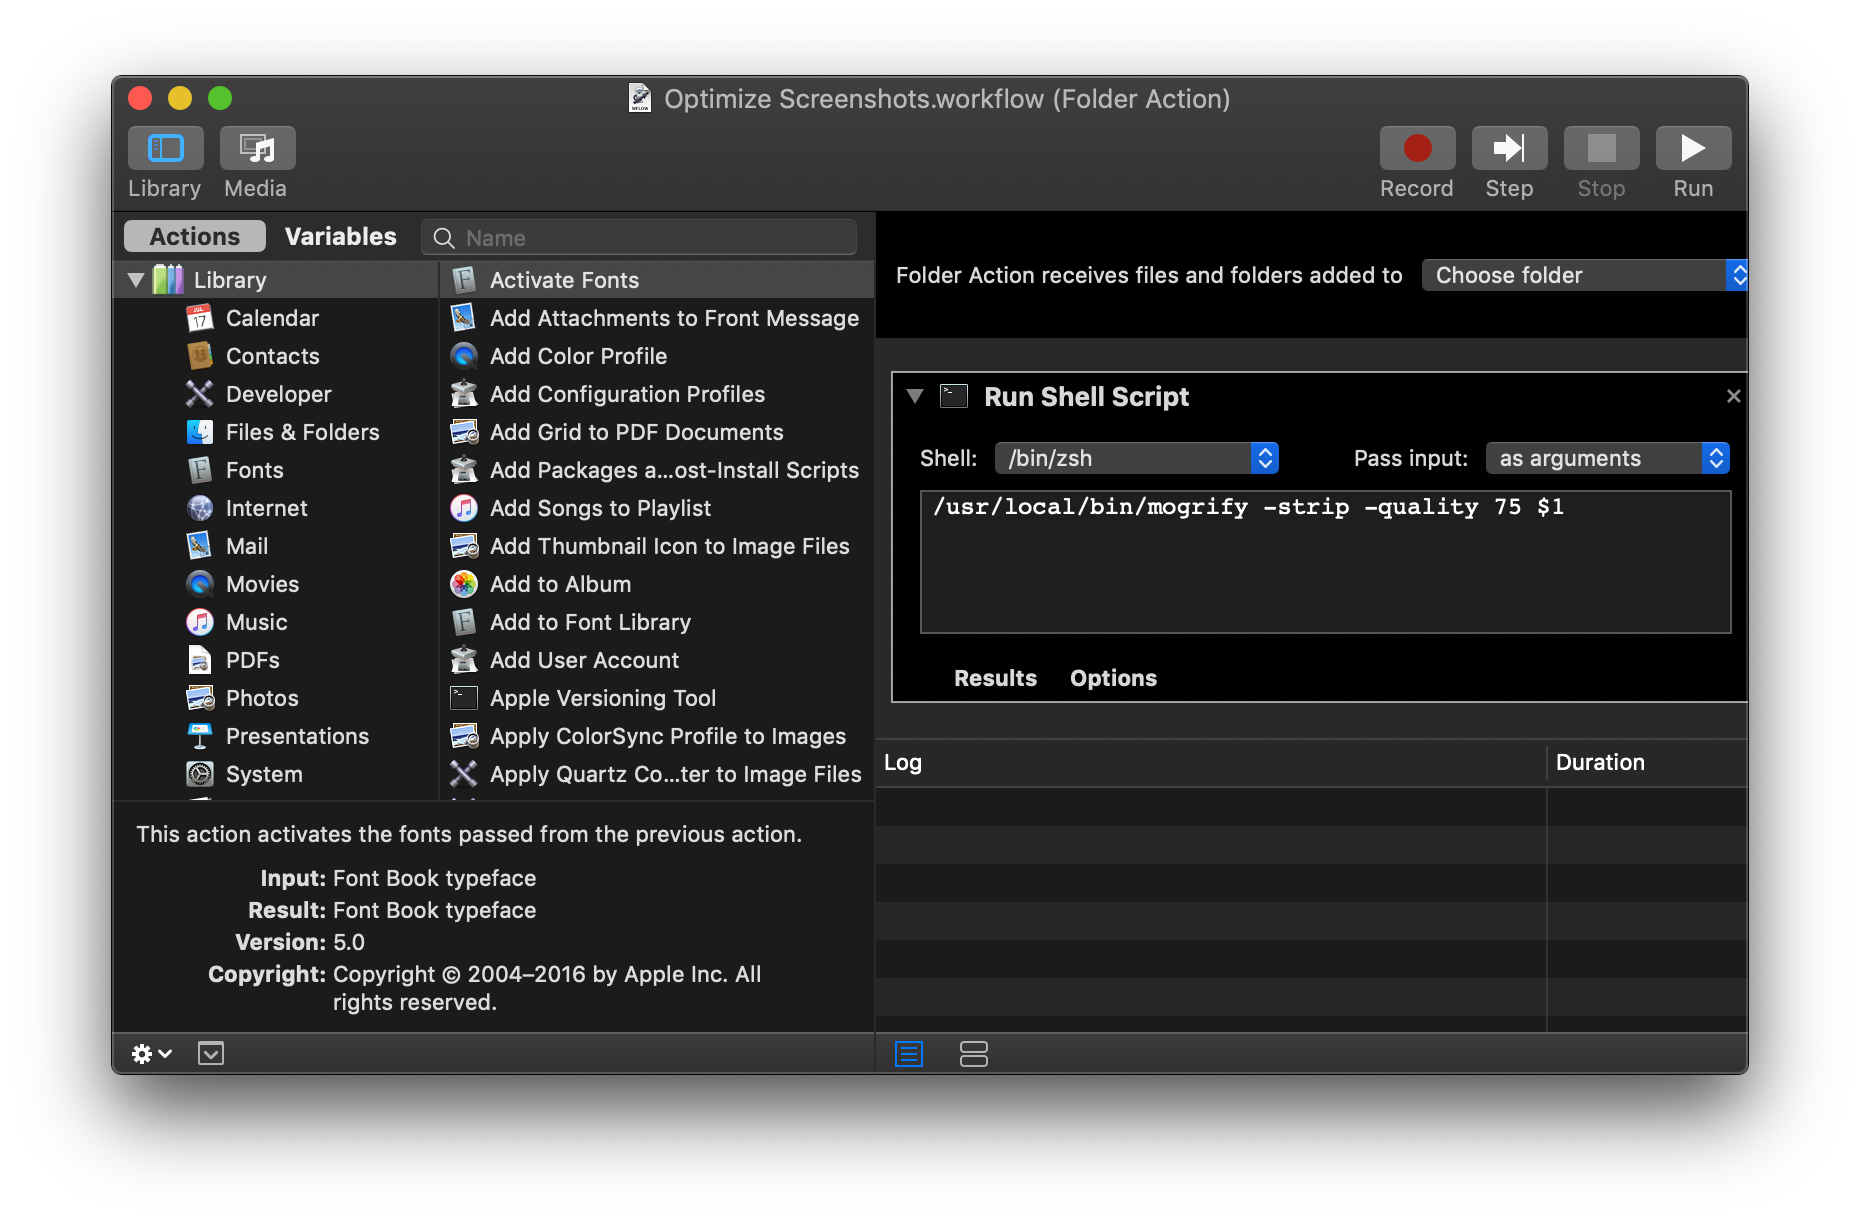
You can consult the ImageMagick documentation to find a command that best suits your needs, but for my purposes stripping the meta tags and reducing the quality to 75% is a baseline "good enough" setting.
Attaching to a Folder
The last step is to attach this workflow to the folder. The easiest way to do that is to find the folder where you'll be saving your screenshots, right-click it and choose Services > Folder Actions Setup from the contextual menu:
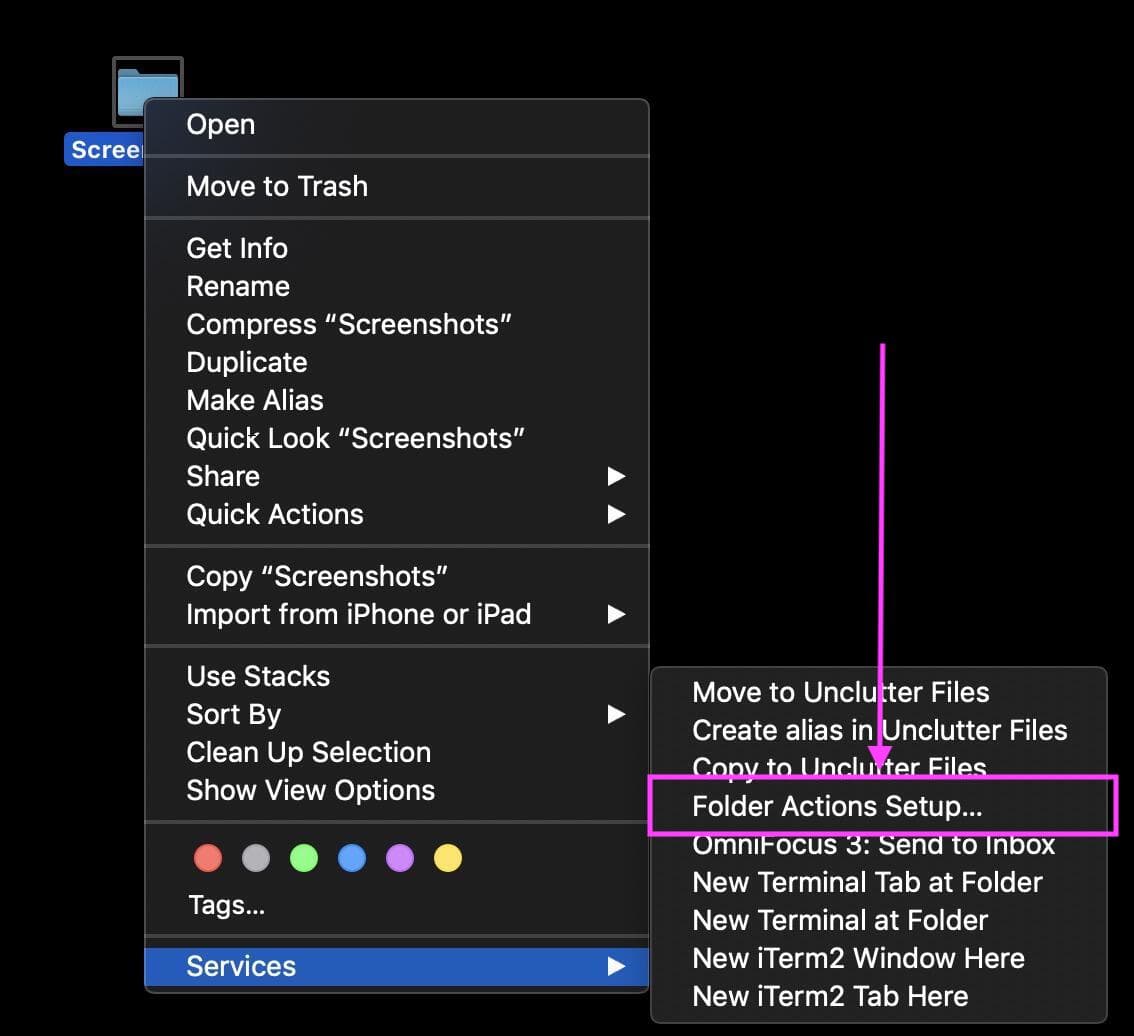
It will ask you to grant permission for the folder actions service to run on this folder, but that should be the only time it asks you. After that you are done! If you've set this folder as the default location for saving screenshots then you should find them saved as optimized JPEGs going forward. Now I can omit the optimization steps in my workflow when sharing embedding screenshots in my emails.
For added flexibility you might consider leaving PNGs as the default file format for screen capture and changing the Automator script to convert PNGs to JPEGs when saved to that folder. To do that you'd want to change your script to something like this:
/usr/local/bin/convert -strip -quality 75 $1 $1.jpg
If you enjoyed reading this consider sponsoring my work on GitHub or subscribing to my newsletter.
Share this post: Hacker News • Reddit • LinkedIn • Mastodon.
Published on Tuesday, April 16th 2019. Read this post as plain-text.